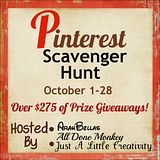
Have you guys been participating in the Pinterest Scavenger Hunt? It's fun way to check out some of the cute seasonal crafts from around the blogosphere and win prizes at the same time.
And boy are there prizes!
There are some grand prizes PLUS weekly prizes. In general, I'd say your chances of winning something are pretty good. Plus it's like going on a walking tour of CraftBloggerLandia. Winning all around.
Create a new Pinterest board specifically for this Scavenger Hunt
Each day, a new clue will be revealed on the Host blogs as well as the Rafflecopter entry form. With the clue, a link will be provided to the blog with the photo to be pinned.
To be eligible to win, you must pin a photo from each clue provided
There are also many additional ways to earn extra entries, so be sure to give them a try!
There is a Rafflecopter box near the bottom of the first post (really, it's huge and hard to miss). Head there and as you do each entry, click on it on the Rafflecopter board to get your corresponding entries. Did Someone Say Prizes? Why yes I did! Check out the prizes for week 4 winners:
Prize: DIYFluffies Cotton Whale Toy Sewing Kit (value $24)
Mariska Vos-Bolman is a dutch soft toy designer, and a graduate from the Utrecht school of Arts. In her Etsy shop customers can purchase ready made Fluffies, complete sewing kits for soft toys, rag dolls, softies, and stuffed animals, as well as downloadable PDF patterns patterns!
All e-patterns are available in English and Dutch, some in German or Spanish.
Her creations are inspired by her sons, as well as her many years of work history in the video game industry.
Once upon a time, I was a supervisor in a customer service call center. To make it easier for supervisors to remain connected to the borg, er, their team, each of us had a laptop. The laptops were standard issue black bricks which could probably withstand being dropped off the roof of a building.
And they were all the same. **YAWN**
So I did what any self-respecting crafter would do - I made mine way cooler.
Because the laptop wasn't actually mine, I needed to make sure the cover could be removed in the event I needed to switch laptops or stopped working there. You can make your own laptop cover, too, for less than $2 (assuming you have Mod Podge on hand).
Supplies Needed:
Laptop (this will work best if yours does not have a textured lid)
Surface cleaner
1 roll white contact paper ($1 - from dollar store)
Coordinating scrapbook paper (on hand or about $0.25 each sheet)
Drinking glasses or other round object to use as a tracing guide
Pencil
Scissors and/or exacto knife
Mod Podge (I used matte finish, but use your fave finish)
Brush or foam applicator to apply modpodge
Step 1: Clean the laptop
Clean your laptop to remove dirt, oil, etc and ensure that the contact paper will adhere well.
Step 2: Cut contact paper
Lay the contact paper over the laptop and trim to the right length and width. Be sure to leave enough extra to wrap over the edges. Remember that you can always trim away excess but you can't add more later. Step 3: Fit contact paper to laptop
Use a small pair or scissors or an exacto knife to carefully cut notches as needed for any moving parts. My laptop had hinges on the back as well as an unlock slide on the front edge that needed to be cut around. Once the contact paper is nice and smooth on the back and wrapped around the edges, trim away any excess to make it pretty. Step 4: Cut out paper
On the back of your pretty paper, trace circles in varying sizes using drinking glasses or other round objects from your home. Cut out your shapes and set aside.
Step 5: Arrange and Adhere
Play with your shapes until you find an arrangement that you like. Once you're happy, use your Mod Podge to glue your pieces down starting with the lowest layer and building up (new to the 'Podge? Check out my friend Amy's video tutorial here for how to use modpodge [although I don't use a brayer - sorry, Amy!])
Make sure you coat the whole thing at the end to seal all the edges and give it a uniform finish.
Step 6: Let dry and enjoy!
Let your laptop dry at least overnight to cure. When you're done you can enjoy working in style.
(links to products within this post are my affiliate links and I may receive a portion of any sales resulting from your click. I promise to only link to products I personally recommend. Thank you for supporting Carissa's Creativity Space)
I know. I feel like I just uttered the words that might make the craft blogger police come knocking.
But honestly? I can totally live without the creepy, scary, gross you out stuff that's become popular. I don't like to be scared. Or grossed out. I like my food to look like, well, food - not witch fingers or worms. Is that so wrong?
But I still love Autumn. And one of the number one reasons is pumpkins. I looooooovvvveeee pumpkins! So much cuter and family friendly than a zombie brain don't you think? So if I show up at your party with a pumpkin cake instead of something looking like it had a bad run-in with the undead, I hope you'll still be my friend.
I made this cake for a Halloween party last year and it was deceptively easy. And also nutritious (it has 2 cups of pumpkin in the mix!). Here's how I did it:
Pumpkin Spice Chocolate Pumpkin Cake
Ingredients: Cake
1 box chocolate cake mix
2 cups fresh pumpkin puree*
2 tsp cinnamon
1 tsp ground cloves
1 tsp ground all spice
1/2 tsp ground cloves
1/4 tsp ground ginger
3 eggs (or however many called for on the box)
1 Tbsp organic canola oil
Decorations
3 green "Airheads" candys (for stem)
1 container prepared frosting, colored orange (Sur la Table is one place you can get Natural Decorating Colors if you're avoiding synthetic food dyes)
*I used the technique I taught here to make my fresh pumpkin puree (it's actually really easy). If you don't have afresh pumpkin on hand to puree, use a 14 ounce can of pumpkin instead.
Pre-heat oven to 325°F. Prepare tall glass bowl for baking by greasing and flouring it. Set aside.
Combine all cake ingredients using a hand mixer. Pour into prepared bowl.
Bake for about 1 hour, 10 minutes or until a wooden skewer inserted in center comes out clean. Run knife around edge of bowl and turn out onto a cooling rack. Allow to cool at least two hours or until completely cool to the touch
Decorate cake by frosting with the orange frosting. Use up and down strokes to simulate pumpkin ridges with the frosting
Make the stem and leaf by putting airheads in a glass bowl and microwaving in 5 second intervals until pliable. (Be careful not to heat it too hot or it may stick to and burn your skin!) Mold candy like playdough to make a stem and leaf shape. Lay over top of cake.
(links to products within this post are my affiliate links and I may receive a portion of any sales resulting from your click. I promise to only link to products I personally recommend. Thank you for supporting Carissa's Creativity Space)
I love decorating for fall. Pulling out the pumpkins, candles and leaves each year makes me so happy. If you're looking for some new decor but don't have the budget, you could do this project for FREE with things you have around your house. And if you don't happen to have everything, you can pick these supplies up at your local dollar store or thrift store.
Supplies Needed:
Two glass cups or candle holders (one needs to be small enough to fit inside the other)
Burlap scraps. Cut yours into strips if they aren't already.
Candle - fake or otherwise
Three Super Easy Steps:
Step 1: Insert small cup
Step 2: Add burlap in the gap
Step 3: Add a candle
or add water and flowers:
That's it! Now sit back and be impressed with your frugal fall crafting self. This project was featured on Thrifty 101
Ok, so I'm already married. But I did make the wedding dress I'm wearing in the pictures even if I didn't actually get married myself in it. My husband and I took some time to get away to the Oregon Coast as a bit of a second honeymoon/family vacation and I wanted a pretty dress to wear on the beach commemorating us re-choosing each other.
Buying a new wedding-type dress was out of my price range (my price range being a mere $20 or less). Luckily ThreadBanger has a great video tutorial for how to make a wedding dress for $10. Check out the video below because it's important to understanding how I made mine. It's only about six minutes long:
Seems pretty simple. I am not a great seamstress by any stretch but I figured I could probably pull this off.
I wasn't able to find a six pack of white shirts but I did find a five pack of 3XL shirts for $13.69 and I picked up a spool for white thread for $1. I wasn't a huge fan of the hanging bit in front on the inspiration dress so figured I'd just do without it and could pull it off with only five shirts.
To get started, I cut open all the shirts and ironed them. Then I sewed four of them together down the long sides and pinned them together around my dress form just like in the video:
I decided I liked how the back fell and made a bit of a train. I still followed the instructions about marking the pin line (I used a purple disappearing marker) but did NOT cut off the extra fabric.
When it was time to work on the wrapped part of the bodice, we ran into an issue. I am about a size 16 - and my bust is probably twice as big around as the model's. In the video, Corinne wraps the fifth piece of fabric around the model twice with enough leftover to tie a knot. I barely had enough to wrap around once and tie a knot.
So I decided to improvise.
I had all the material from the tops of the shirts left and figured I could use that to make a cool ruched top. And this is where I diverted from the ThreadBanger tute.
How I made my dress top:
Step 1: Cut the sleeves off three shirt tops
Step 2: Cut across
Cut straight across the front right under the collar and straight across the back right under where the printed tag is.
Step 3: Sew the short sides together
Split the pieces up into sets of two. Pin them right sides together on the short side and sew to make three strips with a seam in the middle.
Step 4: Sew the long sides together
Now, matching up the seams, match right sides together and sew them down the long sides.
Step 5: Iron and trim
Iron the pieces, pressing seams in the same direction. Trim off any extra material from the edges or seams.
Step 6: Make channels for ruching
Now we need to make channels for the straps to run through in order to gather the material for the bodice. To make sure the opening stayed large enough for the drawstrings, I used a dowel as my guide. I laid it on the seam that runs through all three pieces and then folded the material over and stitched as close to the dowel as I could get (I slid the dowel along as I went).
Then I folded the little pocket I made down onto the main part of the fabric and stitched really close to the fold to make two channels (on the right you can see there is a dowel in each channel).
Now join the ends of the fabric strip (the short ends) and sew together to make a big loop.
Step 7: Make strap
To make the strap (which will also be used for ruching), cut across one of the strips leftover from the bottom of the tshirt. Then use a safety pin to turn the strip inside out, making a long tube.
Step 8: Ruch top
Using the safety pin, thread the strap down one of the ruching channels and then back up the other one.
Try the bodice on your dress form over the dress base (ignore the blue bit and the pink straps there...they're just part of my semi-DIY dress form). Gather the material, arranging it as you like it.
I originally thought I would just gather one side but decided I wanted to do the other side, too. If you want to do the other side, mark the placement with a pin and then sew another set of 2 channels as before then thread the ends of the strap through. Sew the ends of the strap together once they are threaded through the second set of channels.
Step 9: Attach top to dress
Once you have your channels finished and threaded, put the main body of your dress on the form inside out. Put the top back on the dress form inside out being careful to place the channels where you want them to go and keep the straps in between the bodice and dress.
Pin around the dress until you get to the center back. Cut the bodice up the center.
So the you can sew the bodice back where it belongs, mark the pin line you already marked on the body with an X where you want the bottom of the bodice to be.
Sew around the top using a zigzag stitch, skipping the opening of the channels where the straps are to leave them free moving.
Once you're done, flip the dress right sides out.
Step 10: Sew dress together
First we have to pin the back of the bodice down where it belongs. To help gauge where to pin down the bodice along the center back seam, I first pinned the bottom edge to the X I made above. Then put dots down the line to divide the section in thirds. I gathered each bodice section between the seams and then pinned it down along the line between the dots.
Do this on both sides. Now pin the dress back together along the purple pin line you drew earlier and sew along line with wrong sides together.
I could get away with doing it this way because I stopped sewing where the tail/train ended and so when it falls on the finished garment, it covers the stitching. If you were to want to sew beyond the train, you may need to flip the part below the train in and sew them right sides together.
A big thanks to ThreadBanger for the inspiration and tutorial. Hopefully this will help you if you have some curves but are still looking to make an inexpensive wedding dress that works for you.
I'm excited to announce my participation in a fun new project that will be fun for you and will give you a chance to win some great prizes as well. Read below for how to participate and check out the Rafflecopter entry form as well. Good luck!
Now without further ado, I introduce.....
Welcome to the Fall Pinterest Scavenger Hunt and Giveaway!Pin to Win one of five prize packages with a total value over $275!
Create a new Pinterest board specifically for this Scavenger Hunt
Each day, a new clue will be revealed on the Host blogs as well as the Rafflecopter entry form. With the clue, a link will be provided to the blog with the photo to be pinned.
To be eligible to win, you must pin a photo from each clue provided
There are also many additional ways to earn extra entries, so be sure to give them a try!
{Total Grand Prize Value $140.40} ~~~~~~~~~~~~~~ One Week 1 Sponsor Prize Package $20 Gift Certificate to Cherished Bliss One Week 2 Sponsor Prize Package Coilbound Documenting Book from Paper Coterie (Up to $32 value) One Week 3 Sponsor Prize Package Blog Header Redesign from Simply Klassic Blog DesignAd Space on CherishedBliss.com{Total prize value $56} One Week 4 Sponsor Prize Package Partridge and Pear Stained Glass Kit from Suzy's Sitcom Store Cotton Whale Toy Sewing Kit from DIYFluffiesa Rafflecopter giveaway
Quality, hand painted art for your little one.
Specializing in custom wooden and canvas growth charts and canvas wall
art. Each piece is affordable, and 100% handmade and original, no prints
or giclee reproductions. Made to order to your exact specifications.
Any design you imagine can be painted on either wood or canvas charts, as
well as gallery wrapped canvases.
If you enjoy finding new products that fit your lifestyle, you’ll love what’s “in store!” Chris and Nikki started their online store with a belief in their products and potential of their
business. With the flexibility they have as entrepreneurs, they are able to
spend more time with their two amazing kids.
Bowdabra bow and craft tools...
are unleashing creativity all over the world, from beautiful bows for
gifts to elegant bridal accessories and home decor, the crafting
possibilities are practically endless with Bowdabra.Bowdabra bow and craft tools...With its simple-to-use "goof proof" design, Bowdabra is for people of
all ages; even children. Families seeking fun and affordable activities
can spend some quality time together using Bowdabra products to create
unique crafts and wonderful memories.Bowdabra bow and craft tools...Bowdabra products come with a VIP Pass to the membership site, containing craft articles and videos presented in an easy to follow style.
This blog is not responsible for prize redemption, and was not compensated for participating in this sweepstakes.
I am a participant in the Amazon Services LLC Associates Program, an affiliate advertising program designed to provide a means for sites to earn advertising fees by advertising and linking to amazon.com. This post may contain affiliate links to products on Amazon. I promise to only ever link to products I genuinely recommend. Thank you for supporting Carissa's Creativity Space.


 Prize: DIYFluffies Cotton Whale Toy Sewing Kit (value $24)